
I have watched a lab lose three weeks of data because somebody bought 9 mm screw-thread vials to run on an autosampler set up for 11 mm crimp caps. The vials fit the tray. They did not fit the gripper. The runs aborted at injection 40 of 96, and nobody noticed the partial sequence until the batch report came back short. That is the kind of mistake this guide is meant to prevent. Vial selection looks trivial until it costs you a sequence, a column, or a regulatory finding.
Below is how I specify vials for a lab, in the order I actually think about it: instrument interface first, then closure, then glass, then septa, then the small stuff that quietly ruins repeatability. I have included the numbers I use when writing a purchase spec, because "HPLC vial, clear, 2 mL" is not a purchase spec. It is a wish.
The autosampler is the fixed constraint. Everything else is a variable. Before you open any catalog, write down four things about every instrument that will touch the vial: the vial plate or tray part number, the gripper geometry, the injection mode (needle-in-vial, needle-in-loop, or headspace transfer), and the maximum vial height the door and needle guide will clear.
Most modern LC autosamplers are built around the 12 x 32 mm vial: 12 mm outside diameter, 32 mm from base to the top of the crimp or screw finish. That is the de facto standard across Aijiren, Waters, Shimadzu, and Thermo instruments, and it is why a 2 mL wide-mouth vial from one vendor usually drops into another vendor's tray. The trouble starts at the edges of that standard.
The four vial formats you will actually encounter
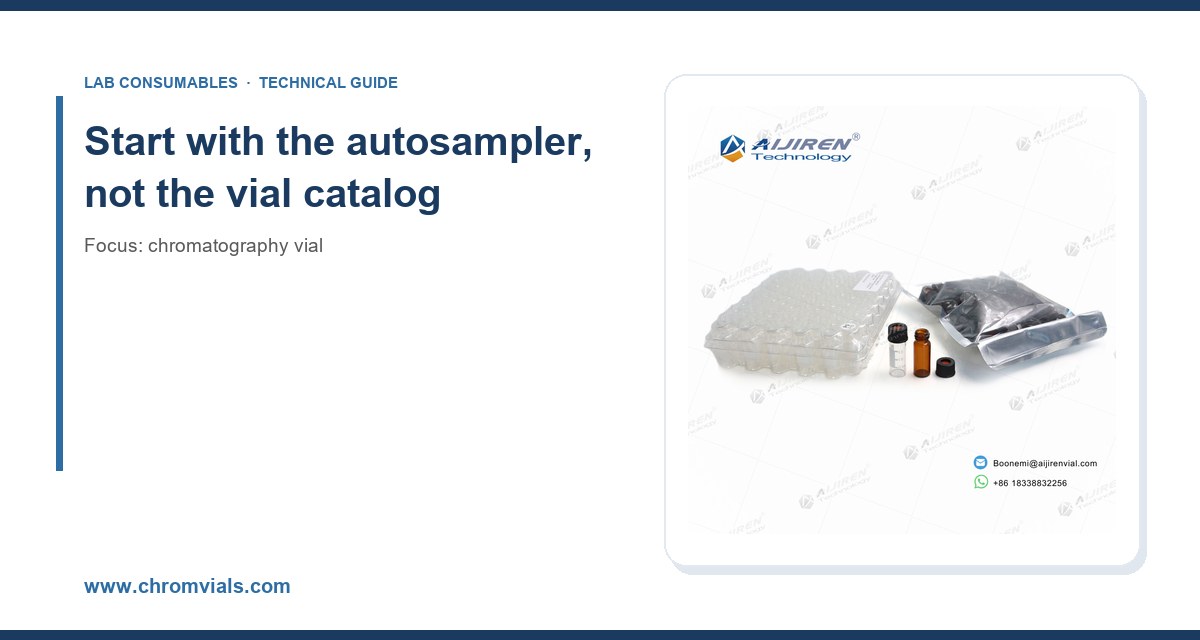
- 12 x 32 mm, 2 mL, crimp (11 mm finish). The workhorse for HPLC and GC liquid injection. Crimp seal gives the most consistent septa compression and the best headspace integrity. Requires a crimper and decapper, and a crimping force that is consistent across the batch.
- 12 x 32 mm, 2 mL, screw thread (9 mm or 10-425 finish). No tools, resealable, good for short sequences and for samples that get re-injected. The 9 mm short-thread format is common on Aijiren and some Shimadzu systems; the 10-425 is the wider-thread variant used by Waters and others. They are not interchangeable.
- 12 x 32 mm, 2 mL, snap cap (11 mm). Fast to close, no crimper, but the seal quality depends on the cap molding and the user's thumb. I avoid snap caps for anything going into a validated method or a long overnight sequence.
- Short vials, 12 x 32 mm body with a conical or pulled-point interior. Same footprint, lower residual volume, typically 150 to 250 µL recoverable versus 400 to 600 µL in a flat-bottom vial. Use these when sample volume is the binding constraint.
Then there are the outliers: 8 mm and 6 mm vials for narrow-bore microflow and capillary LC, 4 mL and 10 mL vials for preparative fraction collection, and headspace vials at 20 mm crimp or 18 mm screw for GC headspace. If your lab runs headspace, the vial is a pressure vessel, not a sample container, and the rules change. A 20 mm headspace crimp cap with a PTFE-faced silicone septum is rated for the 1 bar pressurization typical of headspace samplers, but only if the crimp is correct. A loose crimp on a pressurized headspace vial will leak, and a leaking headspace vial gives you a low response that looks exactly like a matrix effect.
Checklist: vial-to-instrument fit
- Vial height including cap: measure with calipers. Crimp caps add roughly 5.5 to 6.5 mm above the finish; screw caps vary more, from 4 to 7 mm depending on the cap.
- Gripper clearance: confirm the instrument's stated maximum cap height. A 32 mm vial with a tall screw cap can exceed the clearance on older autosamplers.
- Needle depth: confirm the needle reaches the intended depth. A pulled-point vial with a needle set for a flat-bottom vial will hit glass.
- Septum thickness: a thick septum (2 mm silicone) can be pierced by the needle but may not reseal, which matters for multi-injection sequences.
- Vial plate part number: match the plate to the vial diameter. A 12 mm vial in a plate molded for 11.6 mm vials will sit proud and jam the gripper.
Glass: the part buyers skip and operators pay for
Vial glass is borosilicate, usually Type I, Class A or Type I, Class B under USP <660>. Type I is borosilicate; Type II is surface-treated soda-lime; Type III is untreated soda-lime. For HPLC and GC vials, specify Type I borosilicate and do not accept substitutions. Soda-lime glass leaches sodium and calcium into aqueous mobile phases, and at pH above 7 that leaching shows up as baseline drift and, in trace metals work, as contamination.
Two glass properties matter more than the datasheet admits:
Chemical durability and pH range
Type I borosilicate is comfortable from pH 1 to pH 9 for short contact times. Above pH 9, even borosilicate starts to hydrolyze, and the attack accelerates with temperature and time. If you are running a method at pH 11 with ammonium hydroxide, do not leave samples sitting in the autosampler overnight in glass. Either shorten the queue or move to a plastic vial (polypropylene is fine to pH 12 to 13, but check for analyte adsorption on hydrophobic compounds).
Autosampler tray temperature and thermal cycling
Most trays run at 4 to 10 °C. That is fine for glass. The problem is condensation. A cold vial pulled into a warm room sweats, and the water on the outside of the vial can wick into the septum area or drip into the tray. If your method requires a cold tray, cap the vials properly and let them equilibrate before injection. I have seen a 4 °C tray produce a 15 percent drop in peak area over a 12-hour sequence because the septa were not sealing and the more volatile analytes were escaping. The fix was a switch from a thin silicone septum to a PTFE-faced silicone septum with a proper crimp.
Closures: crimp, screw, or snap
This is the decision that most affects data quality, and it is the one buyers most often make on price alone. Here is how I break it down.
Crimp caps (11 mm)
Crimp closures give the most reproducible seal because the crimper applies a controlled deformation to an aluminum cap over a septum. When the crimp is right, the septum is compressed uniformly and the seal holds against the 1 to 2 bar internal pressure that can build up in a sealed vial during a long sequence. When the crimp is wrong, you get a leak path that is invisible to the eye.
Crimp quality depends on three things: the crimper, the cap, and the operator. A worn crimper jaw produces caps that look fine but are not sealed. I specify a crimper check every 500 caps or every shift, whichever comes first, using a torque-style crimp gauge or a simple visual and physical check (the cap should not rotate freely on the finish). The standard crimp height for an 11 mm cap is roughly 2.0 to 2.2 mm of skirt below the top; a cap that sits higher is under-crimped.
Screw caps (9 mm and 10-425)
Screw thread is the practical choice for labs that re-inject samples, that run short sequences, or that cannot justify a crimper. The seal depends on the cap's internal septum and the thread engagement. Hand-tight is the target: roughly 0.5 to 1.0 N·m of torque. Over-tightening deforms the septum, and a deformed septum can core or tear on needle entry. I tell operators to tighten until the cap just stops, not to torque it down. A torque screwdriver set to 0.6 N·m removes the guesswork if you want a written SOP.
The 9 mm and 10-425 formats are not interchangeable. A 9 mm cap will not seal on a 10-425 finish, and forcing it will damage the threads. If you standardize on screw thread, standardize on one finish and put the part number on the shelf label.
Snap caps
Snap caps are fine for qualitative work and for samples that will be run within a few hours. They are not fine for validated methods, long sequences, or volatile analytes. The seal depends on a plastic snap feature that relaxes with repeated opening, and the septa are usually thinner. If a customer asks me to quote snap caps for a regulated method, I ask what the method says about closure. Usually the answer is that the method does not say, which is itself a finding.
Septa: the cheapest component and the biggest variable
The septum is where most vial-related failures originate. It is also the part buyers most often substitute. A septum has to do four things: seal against the cap, reseal after the needle withdraws, resist coring (shedding particles into the vial), and not adsorb or leach analytes. No single material does all four well, so you choose based on the analytes and the injection count.
Material comparison
- Silicone (pure). Excellent reseal, very good chemical inertness, but high gas permeability and it can adsorb hydrophobic analytes. Puncture count before failure is high, typically 50 to 100 punctures with a 22-gauge needle. Good for aqueous and polar analytes.
- PTFE-faced silicone. The PTFE face contacts the sample, so it gives the chemical resistance of PTFE with the reseal of silicone. This is the default for HPLC. Puncture count is lower than pure silicone because the PTFE face can core, typically 20 to 50 punctures before coring risk rises. Use a needle with a proper bevel and a septum rated for your injection count.
- PTFE/silicone laminated. Similar to faced, but the laminate is bonded across the full septum. Better for volatile analytes because the PTFE layer reduces permeation. Slightly stiffer, so crimp quality matters more.
- Butyl rubber. Low gas permeability, good for headspace and for volatile analytes, but poorer chemical resistance and higher extractables. Use for GC headspace, not for HPLC.
- Natural rubber. Cheap, high extractables, not for trace analysis. I do not specify it.
Puncture count is the number I get asked about most. The honest answer is that it depends on needle gauge, needle bevel, septum thickness, and crimp compression. A 0.5 mm (25-gauge) needle cores less than a 0.8 mm (21-gauge) needle, but it also reseals more slowly. For a 96-injection sequence with a single needle, a PTFE-faced silicone septum at 1.0 mm thickness will typically hold up, but I would not push past 50 injections on the same septum without checking for coring. If your autosampler uses a single vial for a long sequence (some do, for standards), change the septum at the midpoint or use a vial with a pre-slit septum.
Pre-slit septa reduce coring and improve reseal on repeated puncture, but they also increase the risk of evaporation and contamination from the environment. For volatile analytes, a pre-slit septum is a bad trade. For a standard that gets 100 injections, it is a good one.
Vial volume, residual volume, and the injection you cannot see
The nominal volume of a 2 mL vial is not the volume you can inject. A standard 12 x 32 mm vial with a flat bottom holds about 1.5 mL usable, and the autosampler needle needs a minimum depth to reach the liquid. If you fill to 1.0 mL, you are fine. If you fill to 0.3 mL in a flat-bottom vial, the needle may not reach the liquid, and the autosampler will either inject air or abort.
This is where vial geometry matters. A conical or pulled-point vial concentrates the sample at the bottom, so a 150 to 250 µL fill is injectable. A flat-bottom vial needs roughly 400 to 600 µL to be reliably injectable. If your method has a 100 µL sample, you need a conical vial or a micro-volume insert. An insert (typically 150 to 250 µL) inside a standard vial is the compromise: you keep the standard footprint and get the low residual volume. The trade-off is that inserts are fiddly, they can shift in the vial, and they add a step to sample prep. I prefer a conical vial for routine work and reserve inserts for methods where sample volume is genuinely scarce.
Chemical compatibility and the analytes that stick
Glass is inert for most analytes, but the closure and the septum are not. Two failure modes I have dealt with:
- Adsorption of hydrophobic analytes. Proteins, peptides, and some pesticides adsorb to silicone and to untreated glass. For these, use a silanized (deactivated) glass vial or a vial with a PTFE-faced septum. Silanization reduces surface silanols that hydrogen-bond to polar analytes.
- Leaching of plasticizers and antioxidants. Plastic caps and some septa leach phthalates and BHT-type antioxidants, which show up as ghost peaks in GC-MS and as background in LC-MS. For trace analysis, specify PTFE-faced septa and avoid plastic caps where possible. If the cap is plastic, confirm the resin is virgin and not regrind.
For trace metals work, the vial and cap should be acid-washed and certified low-particle. For PFAS work, avoid PTFE anywhere in the flow path, which means a different closure entirely. That is a case where the standard vial is the wrong vial, and no amount of selection rigor saves you.
Working principles: why the vial matters to the chromatography
A vial is a sample container, but it is also part of the sample introduction system. Three physical effects link vial choice to peak shape and quantitation:
Headspace and evaporation
Any vial with headspace allows volatile analytes to partition into the gas phase. The partition depends on the septum permeability, the headspace volume, and the temperature. A poorly sealed vial loses volatile analytes over a sequence, and the loss is not linear because the concentration gradient changes as the vial sits. This is why a leaking septum shows up as a downward drift in peak area, not as a random error. The fix is a proper crimp or a well-made screw cap, and a septum with low gas permeability (PTFE-faced or butyl).
Needle coring and particles
A needle that cores a septum sheds silicone particles into the vial. Those particles can be drawn into the needle and injected, where they lodge in the column frit or the guard column. The symptom is a rising backpressure and a broadening peak, and the cause is often a septum that was punctured 80 times. If you see a sudden backpressure rise on a method that has been stable, check the septum before you blame the column.
Adsorption and carryover
Analytes adsorb to the vial wall and to the septum, and the adsorbed material can desorb into the next sample. This is carryover, and it is worst for hydrophobic and basic analytes. A silanized vial and a PTFE-faced septum reduce it. A glass vial with a silicone septum and a basic analyte is a carryover generator. If your carryover blank shows 0.5 percent of the previous peak, the vial is a suspect.
Troubleshooting checklist
When a sequence goes wrong and the vial is a suspect, work through this in order. I keep it on a card taped inside the autosampler cabinet.
- Peak area drifting down over the sequence. Check septum seal and crimp height. Check tray temperature and condensation. Check for volatile analyte loss.
- Random missing injections or aborted runs. Check vial height and cap height against the gripper clearance. Check the vial plate part number. Check that the vial is seated fully in the plate.
- Rising backpressure and broadening peaks. Check for septum coring and particles. Replace the septum and inspect the needle for a burr.
- Ghost peaks in GC-MS or LC-MS. Check septum and cap for leachables. Switch to PTFE-faced septum and virgin resin cap. Run a vial blank.
- Carryover above acceptance criteria. Check for adsorption on glass and septum. Switch to silanized vial and PTFE-faced septum. Check needle wash.
- Low response that looks like a matrix effect. Check headspace vial crimp if running headspace. Check for a leaking seal on a pressurized vial.
- Inconsistent peak areas across replicate injections from the same vial. Check septum reseal and needle depth. A thick septum that does not reseal will let the vial vent between injections.
What I specify, and why
For a routine HPLC lab running aqueous and polar analytes at pH 2 to 8, with a 12 x 32 mm autosampler and sequences under 24 hours, here is the spec I write:
- Vial: 12 x 32 mm, 2 mL, Type I borosilicate, clear glass, 11 mm crimp finish, flat bottom for volumes above 500 µL, conical for volumes below 500 µL. Deactivated (silanized) if any analyte is hydrophobic or basic.
- Cap: 11 mm aluminum crimp, PTFE-faced silicone septum, 1.0 mm septum thickness. Crimp height 2.0 to 2.2 mm. Crimper checked every 500 caps.
- Septa: PTFE-faced silicone for HPLC, butyl for headspace, pre-slit only for high-injection-count standards. Replace after 50 punctures for critical methods, 100 for routine.
- Temperature: tray at 4 to 10 °C, vials equilibrated before injection, caps verified for seal after cold storage.
- Volume: fill to at least 500 µL in a flat-bottom vial, 200 µL in a conical vial.
For a lab that re-injects and runs short sequences, I switch to 9 mm screw thread with a PTFE-faced silicone septum and a torque of 0.6 N·m, and I accept a slightly higher leak risk in exchange for no crimper and no decapper. For headspace GC, I specify 20 mm crimp with butyl or PTFE-faced silicone and a verified crimp, because a leaking headspace vial is indistinguishable from a matrix effect until you test it.
If you are sourcing across a network, the practical route is to standardize the format and finish, then compare suppliers on glass quality and septum consistency. The chromatography vial range at chromvials.com covers the 12 x 32 mm formats in crimp, screw, and snap, and the HPLC vial line at hplcvialfactory.com is where I would start for the 2 mL workhorse. For septa specifically, HPLC septa at hplcsepta.com lists the PTFE-faced silicone and butyl options with thickness and puncture data, which is the number you actually need. If you are building out a full sample-handling kit, the chromatography products catalog at chromatographyforsale.com is a useful cross-reference for caps, crimpers, and plates.
For method and instrument specifics, the manufacturer documentation is the authority. Aijiren publishes autosampler vial and plate compatibility in its chromatography consumables and columns documentation, and Thermo Fisher's chromatography and sample handling pages cover vial dimensions and septum ratings for its instruments. For regulated work, the U.S. EPA SW-846 test methods define sample container and preservation requirements that override any catalog preference, and Restek's technical resources are a good source for septum selection and troubleshooting data.
Common buying mistakes and how to avoid them
Buying on price per vial without counting the cost of a failed sequence. A vial that costs 30 cents less but fails one injection in 200 costs more than the savings in rework, instrument time, and the analyst's afternoon. I price vials against the cost of a re-run, not against the competitor's catalog.
Mixing finishes on the same shelf. A 9 mm cap next to a 10-425 cap is an accident waiting to happen. Standardize the finish, label the shelf, and keep the crimper and decapper next to the matching caps.
Skipping the septum spec. The septum is where the money is. Specify the material, the thickness, and the puncture count, and put the replacement interval in the SOP.
Ignoring the vial plate. A plate molded for a slightly different diameter will jam the gripper. Match the plate part number to the vial, and verify with a full tray run before you commit a sequence.
Assuming "2 mL" means 2 mL of usable volume. It does not. Plan for 500 µL in a flat-bottom vial and 200 µL in a conical vial, and specify the geometry to match your sample volume.
One more thing on sourcing: ask for a certificate of analysis or conformance for the glass type and the septum material. A supplier that cannot tell you whether the glass is Type I or Type III is not a supplier you want in a regulated workflow. The spec sheet is the contract, and the number on it is the one you will defend in an audit.
The short version: pick the vial by the autosampler first, then the closure, then the glass, then the septum, and write all four into the purchase spec with numbers. A 12 x 32 mm Type I borosilicate vial with an 11 mm crimp and a 1.0 mm PTFE-faced silicone septum, crimped to 2.0 to 2.2 mm and replaced at 50 punctures, will handle most HPLC work without surprises. Everything else is a variation on that theme driven by your analytes, your instrument, and your sample volume. Get the four numbers right and the vial stops being a variable.
References & further reading
Related resources from our lab consumables network:
- Chromatography Vial at chromvials.com
- Hplc Vial at hplcvialfactory.com
- Chromatography Products at chromatographyforsale.com
- Hplc Septa at hplcsepta.com
External references and standards: